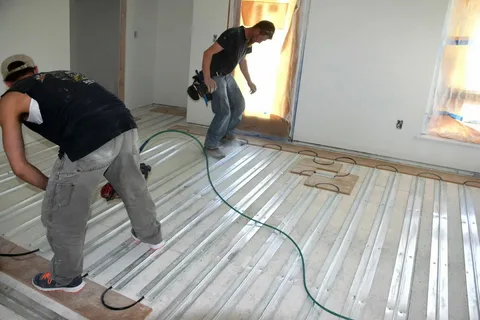
Gypcrete can help improve the stability of your structure. Hiring licensed installers helps extend the durability of your flooring. Site preparation, application, and drying are some of the necessary processes for making gypsum-based underlayment. Here are five steps for installing gypcrete:
Contents
1. Preparing the Site for Installation
The applicator starts by inspecting the construction site to make sure the area can support the weight of the gypcrete underlayment. The applicator sweeps the installation surface to remove dirt or debris. This prevents the dirt from getting mixed with the concrete and causing air spaces and uneven application.
Removing wax, oil, and grease creates a clean and smooth surface for pouring gypsum concrete. The substrate must be dry before installation. Maintaining the room’s temperature at 50 degrees Fahrenheit prevents excessive buildup of moisture. A dry floor helps deter the growth of mold or mildew.
2. Coating the Site with a Primer
Putting a gypcrete primer between the adhesive surface and the gypsum-based substrate strengthens the bond between the underlayment and floor surface. When applied effectively to form a uniform primer layer, the layer penetrates the gypsum substrate’s pores to bolster the stability of the structure. You can use a sprayer or a paint roller to apply the primer. Before application, make sure you mix the primer with water if needed. This helps improve the flow of the primer when spraying and makes sure the primer levels out efficiently once sprayed or applied on the floor surface.
3. Applying Gypsum-based Concrete
After applying a primer, mix and pour the concrete. The gypcrete is a mixture of minerals and cement that has to be mixed with water and sand for pourability. Mix sand and water following the manufacturer’s specifications to avoid making a slurry that is too thick or too thin.
Installation thickness depends on the preferences of the client, the weight limit, and the level of sound dampening goals. Skilled applicators pour the underlayment between three-quarters of an inch and three inches thick. The product’s self-leveling property lowers the need for additional treatment after pouring out the concrete mix.
4. Drying the Surface
Properly ventilate the area where the gypsum concrete is poured so it can dry. In areas with low humidity, create an open-air setting around the drying concrete mix. You can also open windows to allow air circulation that helps speed up drying.
For humid conditions use fans or heaters to shorten the drying time. Drying time increases if you pour a thick underlayment. If people need to use the floor while it is drying, temporary planks can be laid down on top to make sure the gypsum concrete remains untouched. The concrete mix dries in seven to ten days.
5. Testing Moisture and Installing Floor Coverings
Once dry, assess the underlayment to determine its moisture content. Use a moisture meter to obtain accurate measurements of the inner material. Experienced applicators do this by putting pins into the cement so they can get a comprehensive moisture percentage reading. After making sure the moisture content is low, applicators install the final floor coverings to protect the gypsum concrete. The installer will seal the concrete before installing the flooring materials.
Use Gypcrete Today
You can work with skilled applicators for underlayment installation to create quality and durable surfaces. Applicators have a variety of products and tools to prepare the site and install the gypcrete to enhance the comfort and safety of your indoor areas. Gypsum concrete is fire-resistant and sound proofs indoor spaces in residential and commercial properties. Contact providers of floor underlayment today to learn more about the steps of installing gypsum-based underlayment.
